本地Windows 7远程连接VPS的教程
发布时间:2023-10-17 11:38:30 来源: 纵横云
本地Windows 7远程连接VPS的教程
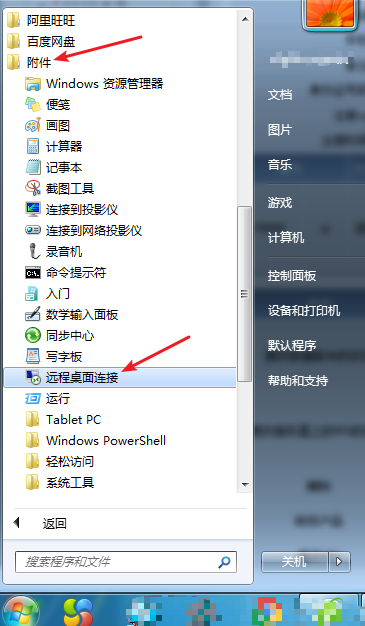
1.点击开始-所有程序-附件-远程桌面连接
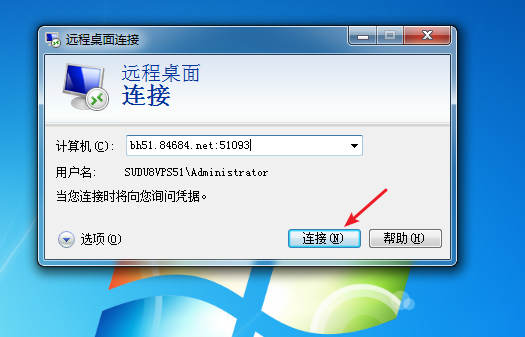
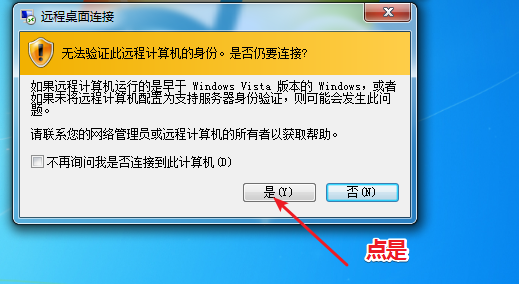
2.在远程桌面连接 计算机中输入VPS的远程地址,然后连接。
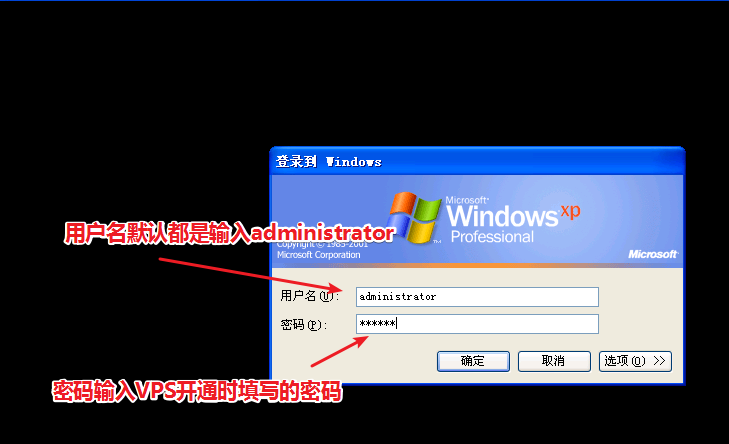
3.输入VPS的用户名和密码,然后确定。用户名默认都是administrator,密码是你开通vps时自行设置的密码。
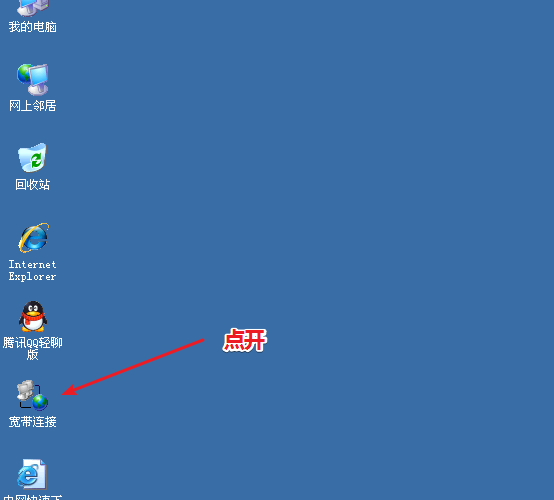
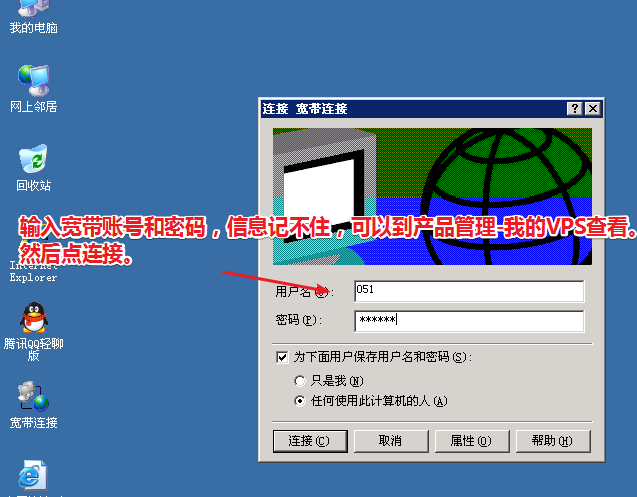
4.进入vps后,点开vps桌面上的宽带连接,输入开通VPS时提供给你的宽带账号和密码,然后连接。
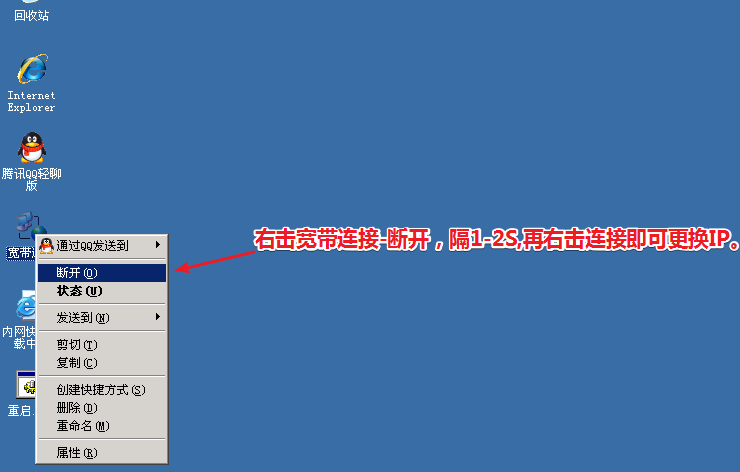
5.如果要更换IP,右击VPS桌面上的宽带连接-断开。隔1-2S,右击宽带连接-连接即可更换IP。
本文来源:
https://www.zonghengcloud.com/article/12615.html
[复制链接]
链接已复制


