Centos7系统部署cloudboot
Centos7系统部署cloudboot
1.关闭防火墙,并禁止防火墙开机启动
systemctl stop firewalld.service
systemctl disable firewalld.service

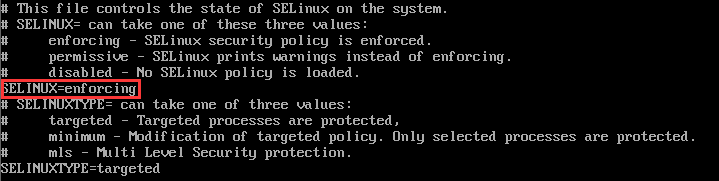
2.永久关闭selinux
vi /etc/selinux/config
将SELINUX=enforcing改为SELINUX=disabled
保存后重启
3.下载一键安装包并上传到服务器/root/目录下
安装包下载路径:http://59.57.14.133:8081/software/cloudboot-1.4-1.x86_64.rpm

4.执行安装命令
rpm -ivh cloudboot-1.4-1.x86_64.rpm

5.导入ISO系统安装介质到对应目录
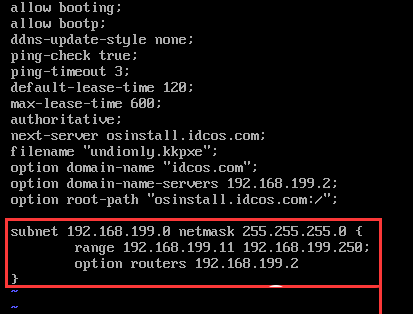
6.配置DHCP
vi /opt/cloudboot/etc/dhcp/dhcpd.conf
按下图红框所示配置DHCP需要分配出去的IP地址范围并保存:
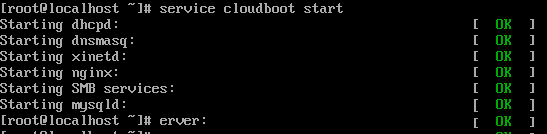
7.启动CloudBoot系统
service cloudboot start
8.DHCP的网段在系统网卡文件上必须有一个IP地址,如果第一项dhcpd没运行起来,需要检查一下cloudboot目录下的dhcp配置文件是否有配置IP段和掩码,以及系统上是否有该网段的IP地址,然后再运行以下命令:
service cloudboot dhcpd start

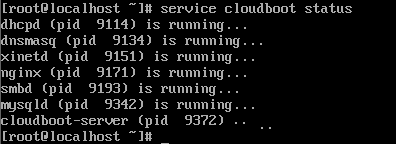
9.查看cloudboot运行状态
service cloudboot status
全都为running表示cloudboot运行正常
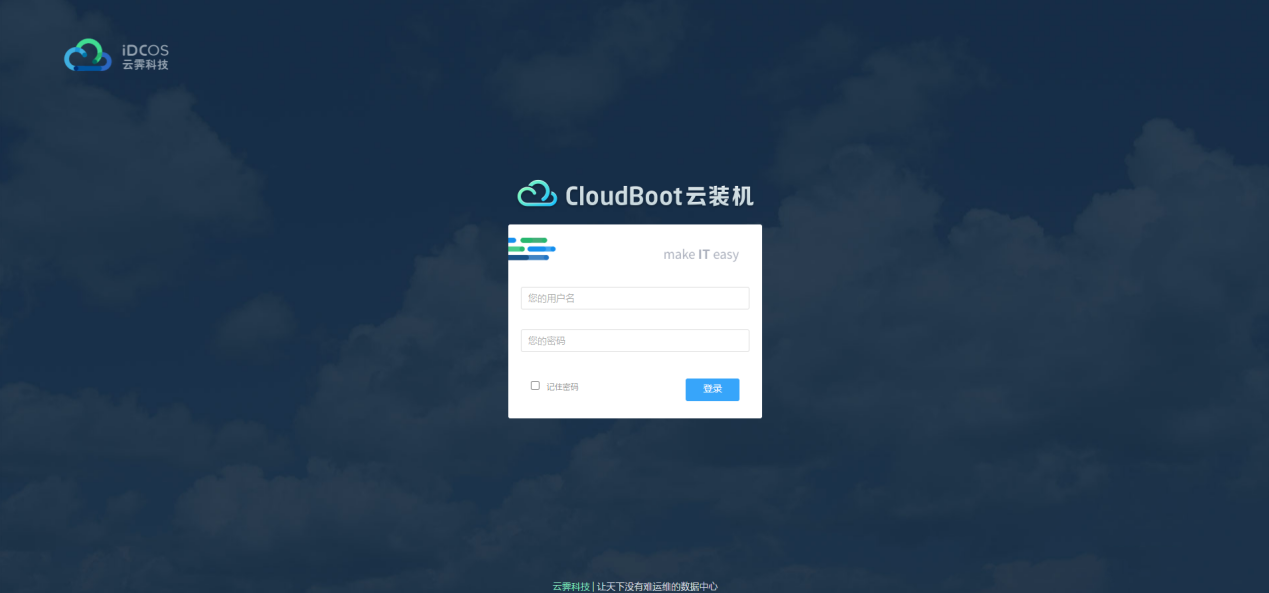
10.接下来我们可以登录Web页面继续配置。首先,通过IE浏览器输入服务器的IP地址,web页面如下图所示,输入初始的用户名admin 密码admin登录:
11.登录之后,会提示设置DHCP,这里按实际需求进行配置,然后点击“下一步”(此时,系统将自动重启dhcp服务):

12.提示“是否要创建虚拟机”选择“否”,然后“提交”:

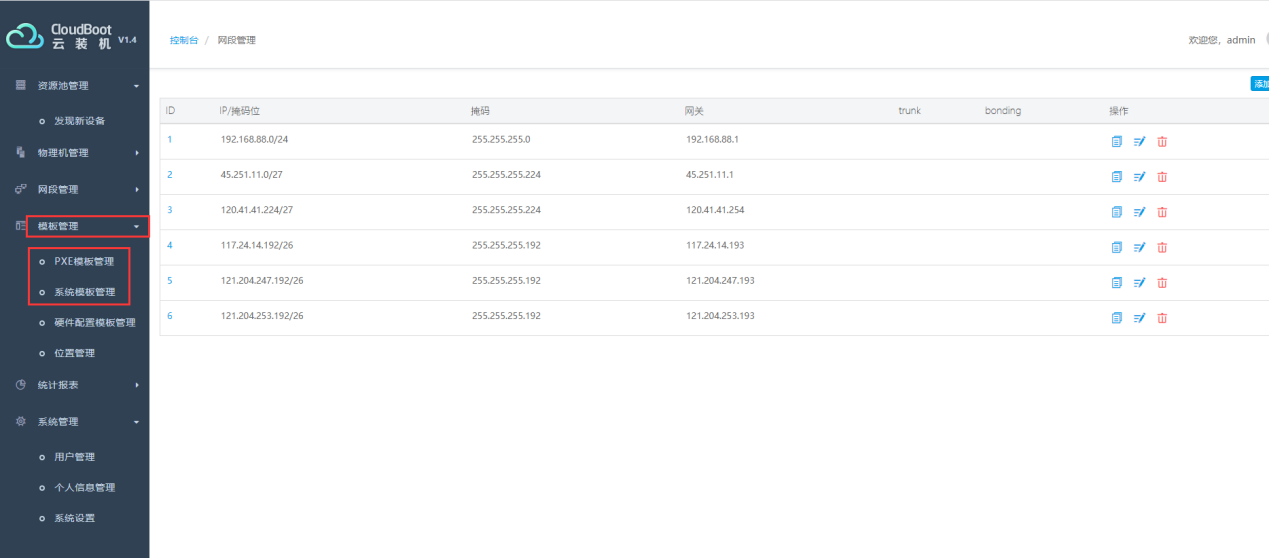
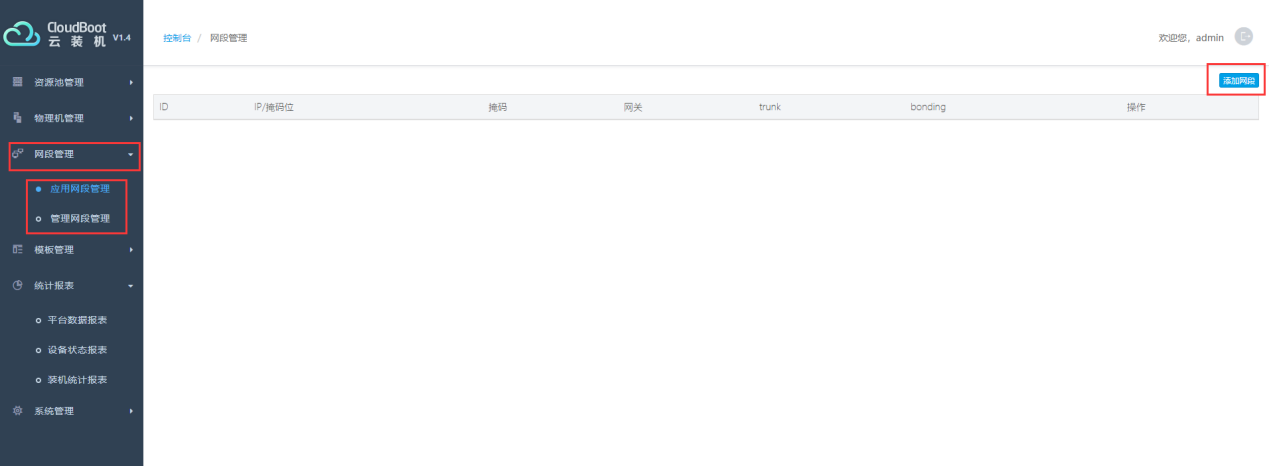
13.接下来,打开“网段管理”,这里的网段分为应用网段和管理网段,应用网段即要分配给客户服务器的公网地址所在的网段,而管理网段则为客户服务器的IPMI网段。我们根据实际情况分别选择“应用网段管理”和“管理网段管理”添加IP地址即可:
14.打开“模板管理”,我们要让服务器自动安装系统,需要用到PXE模板和系统模板,各系统版本的模板需要根据我们实际的安装需求进行修改和定制: